Remodelling Your Kitchen Ideas (using what is there)
The kitchen is the heart of every home. It is where families gather, where holidays are celebrated, and where many of life’s most memorable moments begin. And for most of us, it’s one of the most important rooms in our homes. So if you are thinking about remodelling your kitchen, it’s important to make good use of the space you have and design a kitchen that works for you.
If you are looking to remodel or as some will say, upcycle your kitchen, read our step to step guide with lots of tips and ideas to get you started.
Step 1: Have a Strategy when you are Remodelling
The first step to any kitchen remodelling is creating a plan. This step is especially important if you’re working with a limited budget; knowing exactly what you want and need will help you make the most of your resources.
Sit down and think about how you want your kitchen to look and function; consider what kind of layout would work best, what appliances you need, and the type of cabinetry that will suit your needs. If you’re not sure where to start, there are plenty of resources available online, in kitchen retailers or in home improvement stores that can give you lots of ideas for designing your space.
When you have a general idea of what you want, it’s time to start getting into the details. Make a list of everything that needs to be done and in what order to complete your remodel, these should include big-ticket items like new cabinets as well as smaller details like hardware and lighting fixtures. Knowing exactly what needs to be done will help keep costs under control and ensure that nothing is forgotten during the renovation process.
Step 2: Dismantle and/or Prepare Your Kitchen
The next step in your kitchen remodel is the demolition and/or prepping of your space. This step will vary depending on the extent of your renovation; if you’re starting from scratch, then you’ll need to remove everything that’s currently in your kitchen. However, if you’re only making cosmetic changes, then this process may be as simple as removing existing appliances.
When you have removed everything that needs to go, it’s time to start preparing for the new elements of your kitchen. This may involve patching up holes in walls, installing new plumbing, new electrics, or securing any other necessary permits before construction can begin.
If you’re working with a limited budget, there are a few ways to save money during this stage of the remodel. One option is to do some or all of the work yourself; another is to source materials from salvage yards or reuse centres instead of buying everything new. Regardless of how you choose to proceed, taking the time to properly prepare your space will pay off in the long run by ensuring a smooth and successful renovation process.
Step 3: Strip Kitchen Cabinets
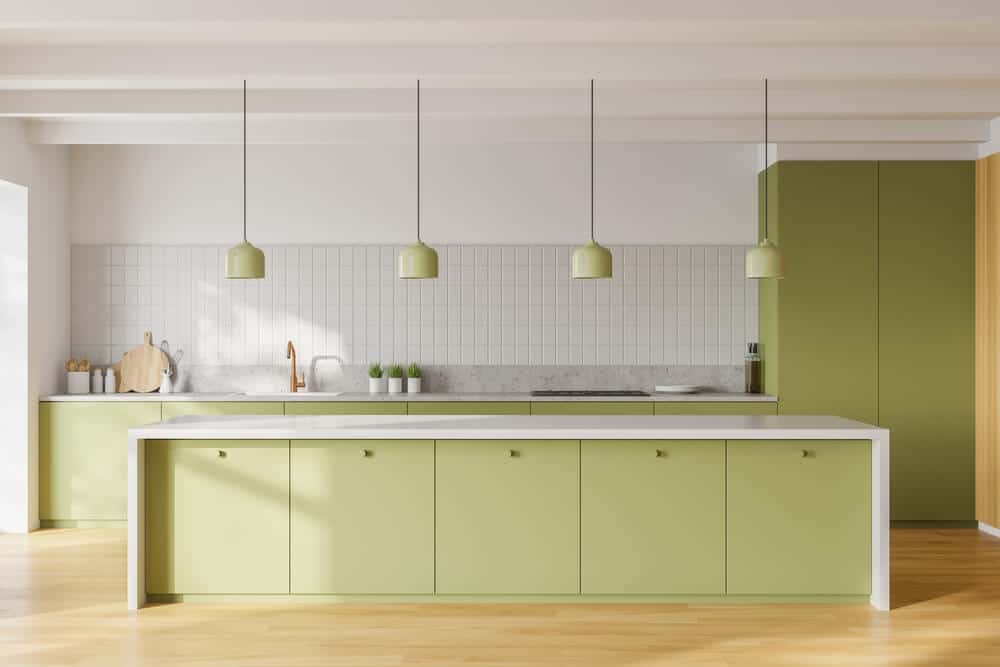
If your kitchen cabinets are solid and in generally good wear but you don’t like the colour or finish then there are now some amazing products out there that will save you the expensive process of replacing them all.
Eco solutions paint and varnish remover will easily and safely remove the paint or varnish on cupboards and allow you to repaint them yourselves. There are some amazing kitchen, bathroom and chalk paints available that if you take your time will look like you have had a brand new kitchen installed.
Eco Solutions Paint & Varnish Remover is easy and safe to use, it is water-based so there are no concerns over skin burns with now harmful fumes when you are using it. Simply paste it onto the surface, wait for it to work its magic and then scrape or wipe the product and the top surface layer away. It’s that easy, give it a wipe down with warm water and then wait for it to completely dry out before you paint it with your desired chalk or cabinet paint. Leave the painting of your cabinets to the last stage when all the dust and messy jobs are finished.
Step 4: Electrics and Plumbing
The next step in remodelling your kitchen is to fix your electrical and plumbing system so you have everything you need in the right locations. Our advice would be that you hire a plumber and electrician to do these jobs for you as they can be dangerous and end up in disaster if you don’t have the experience to do them.
Step 5: Paint Walls
The next step in your kitchen renovation is to paint the walls and ceiling in the colour you have chosen. This can be a fun and creative process, so don’t be afraid to experiment with different colours and techniques.
If you’re not sure where to start, try looking at inspirational photos online or in magazines. When you have an idea of the look you’re going for, head to your local hardware store and pick out some sample paints. Always buy sample paint pots first and paint small areas so you can see how it looks in the daylight and evenings.
When you’re ready to start painting, make sure to prep your surfaces first by cleaning them and removing any old wallpaper or paint that may still be clinging on. Once that’s done, you can begin painting. Sugar soap is an excellent cleaner and primer for skirting boards and doors before you start painting.
Start with a primer coat if you’re using a dark colour or painting over a dark colour; this will help the new paint adhere and give you a more even finish. Then, begin painting in sections, starting at the top of the wall and working your way down. Use long strokes and be careful not to overload your brush or roller which will result in streaks or uneven coverage.
Painting is one of the most satisfying parts of a renovation project, so take your time and enjoy it! Leave every coat enough time to dry before you start the next one and try not to overlap areas which will give you an uneven finish. With a little bit of effort, you’ll have beautiful new walls that really make your kitchen feel like home.
Step 6: Cabinets and Flooring
If you’re planning to update your kitchen, one of the next steps is installing your new cabinets and flooring. Updating your cabinets will give your kitchen a whole new look. Whether you replace them all, repaint them and or replace the handles you won’t believe the difference it will make, the possibilities are endless.
The same is true for flooring. You have lots of options when it comes to both materials and colours. Wood floors are beautiful, and natural-looking, as well as adding warmth to any room. Tile floors are great for homes with high-traffic areas, such as kitchens and bathrooms. Ceramic tiles are durable and easy to clean. Vinyl flooring is popular for homes without much moisture as it’s chemical resistant, easy to clean and waterproof and there are some amazing vinyl’s out there now that can look like the real thing.
If you’re remodelling your kitchen, take your time to look at the flooring options available and ask for samples to bring home to look at in your rooms light and against the walls you have painted and the colour you have chosen for the cabinets.
Step 7: Install Worktops
The next step of your remodelling is to order and install your worktops. This can be a big job, depending on the size and scope of your remodel, so it’s important to do your research and make sure you’re up for the task before you begin. If you arent experienced in this type of thing we would say that this is another job for an experienced tradesperson to do for you, cutting the worktop to size and ensuring your sink will fit is hard to do if you’ve never done it before.
Whether you decide to install granite, quartz, tile or another type of material, choosing the right countertop for your kitchen can be a daunting task.
You can avoid much of the hassle and headache by doing your homework before you begin. This includes deciding what type of worktop is right for your needs and budget; spending time to find a reliable worktop supplier who will order and install them for you as well as clean and protect them once they are installed will save you time and money in the long run.
When your worktops are installed, you can finally start putting in the finishing touches that will make your kitchen look and feel like home.
Step 8: Install a Backsplash
If you are having them then this is the time to install your backsplash. These can be installed yourself if they are already cut to size but if you’re at all unsure then ask your worktop installer to do this job for you as well.
Step 9: Install the Sink and Appliances
The next step is to install your sink and your appliances. If you are not experienced at doing this then again you may want to arrange for a suitable tradesperson to do this for you. FRidge and fridge freezers are reasonably easy to do compared to plumbing in dishwashers and washing machines. Any gas appliances should always be installed by a Gas Safe registered engineer to ensure they are in safe working order. Appliances can be another big job, depending on the size and scope of your remodel, so it’s important to do your research and make sure you’re up for the task before you begin.
Step 10: Use Professionals When Remodelling
If you’re not comfortable doing some of the remodelling work yourself then you should call a professional. Make sure to get a couple of quotes from different contractors for each job (unless you have had a recommendation) before you make a final decision; spending a bit of time up front will save you headaches (and potentially money) down the road.
If you’re planning a remodelling of your kitchen, one of the first decisions you’ll need to make is whether to start from scratch or work with what you already have. If your kitchen is in good condition and just needs a few cosmetic updates, then a partial remodel may be all that’s necessary. However, if your kitchen is outdated or in poor condition, then starting from scratch could be your best option.
Once you’ve decided how extensive your remodel will be you can start the steps above. This means removing existing cabinets, countertops, appliances, flooring, and anything else that you don’t want in your new space. It can be helpful to take photographs of your old kitchen as you go so that you have a reference for when it comes time to put everything back together again.
With the old elements out of the way, you can start to bring in the new elements. This is where having a clear plan for your space will come to fruition; knowing exactly what fixtures and finishes you want will make this part of the process much easier (and avoid any last-minute changes that could add to the cost of your project).
Remodelling Using Eco Solutions Paint and Varnish Stripper
Remodelling your kitchen is a lot of work. If you’re doing it yourself, you’ve got to be extra careful when it comes to paint, varnish, wood and other finishes.
If you are remodelling and faced with the challenge of removing paint or varnish from your kitchen, floor, cabinets, walls or even patio furniture then Eco Solutions Paint and Varnish Stripper will get the job done for you. It works on all types of surfaces from wood cabinets and hardwood floors and you should always do a patch test on a small area first. You will be amazed at how quickly, easily and safely your Kitchen Upcycle will be completed using Eco Solutions products.
Our paint and varnish stripper is safe and guaranteed to work on your surfaces, and you can find a list of our stockists here.